Overview
Welcome! There are four steps to getting started:
- Request an Account
- Set your Password
- First Login
- Create a Notebook
You need at least one Notebook to hold the location you’re interested in. The Login Wizard will walk you through the process of creating it.
1. Request an Account
Visit https://connectivityexplorer.com and click on “Request Account”
You’ll be directed to a page where you can register:
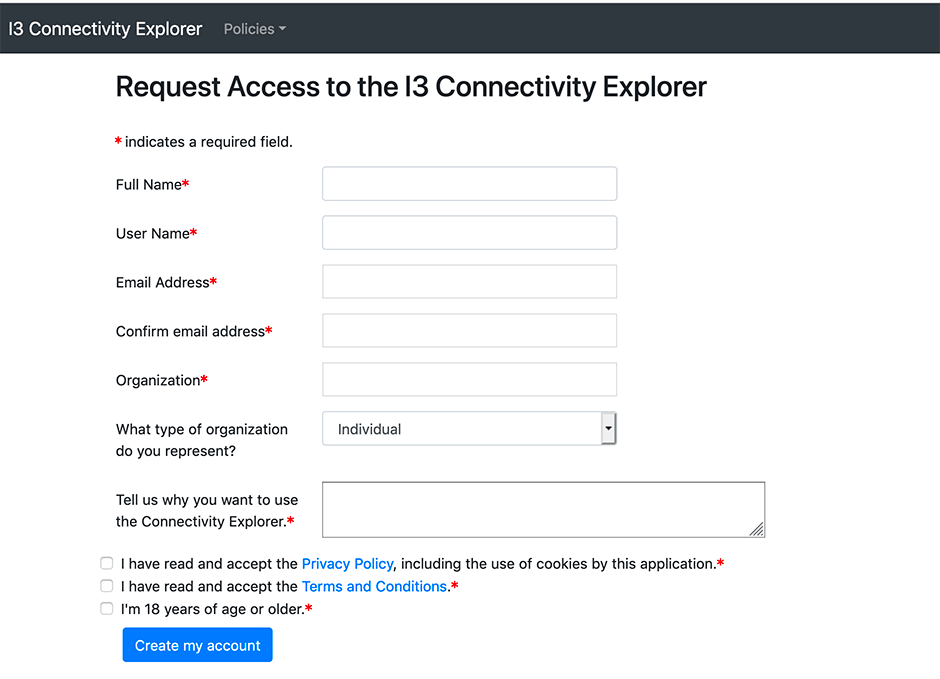
- Fill in the requested information. Your email address must be a working email address! It will be used both your login and for sending you a password reset link.
- Click Create my account. An email will be sent that invites you to set your first password.
2. Set your Password
Look for an email message! It will contain the password reset link.
-
Using the link in the email that you received from internet-is-infrastructure.org, click on the link to set your password.
-
Once the password is set, you can log in. The Connectivity Explorer doesn’t log you in automatically after a password reset, so you’ll be returned to the login page.

Tips
![]() The login page has news about the key features of the latest release.
The login page has news about the key features of the latest release.
![]() Sometimes your email is blocked by a filter, or ends up enmeshed in the Net. Dont’t worry! Your account has been created. Usually, you can go back to the Login page and request that your password be reset (Click ’ Forgot Password? ’ to initiate the request. That request often goes through.
Sometimes your email is blocked by a filter, or ends up enmeshed in the Net. Dont’t worry! Your account has been created. Usually, you can go back to the Login page and request that your password be reset (Click ’ Forgot Password? ’ to initiate the request. That request often goes through.
3. First Login
Enter the email address and password you just created.
The first time you login you’ll be asked to review your usage tracking preferences. The page will lead you through the process. Please consider opting-in. It will help to improve the application.
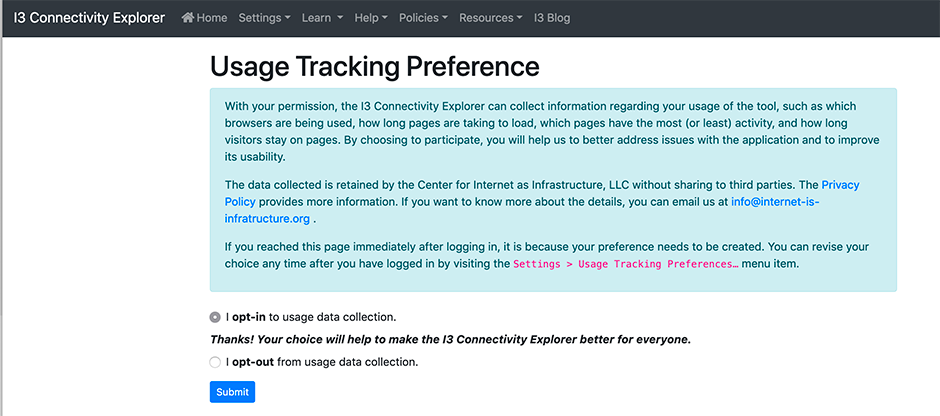
Then you’ll be lead through the process of creating the first of what I hope will be many notebooks.
4. Creating your First Notebook
First, you’ll be prompted for a title, and a description. The title will show up in the “Active Notebook” selector, so choose something that will help you remember its purpose. The description is for your own use. These fields can be edited at any time.
Here’s what the initial notebook creation page looks like. In this example, the notebook will be for King County, WA.
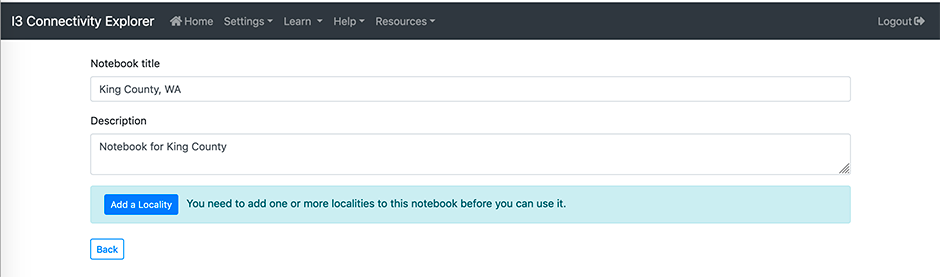
Click Add a Locality. This will take you to the page for finding localities.
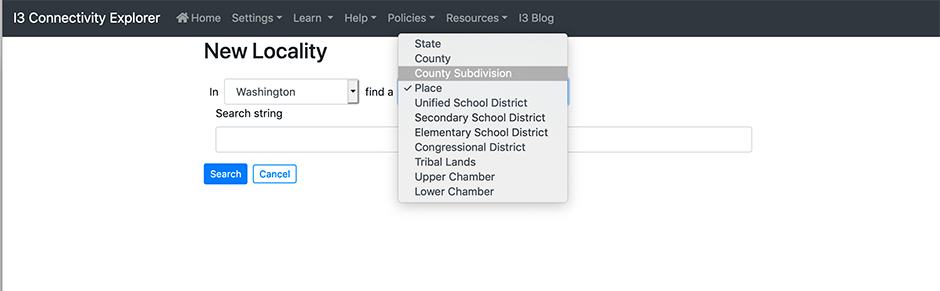
Add one (or more) Localities.
A “locality” is a geographic location within a state, and is will be one of several census-defined location types. On this page you
a. Choose a state or territory.
b. Choose the type of the locality.
c. Enter a search string for the name of the locality
Tips
![]() The search box tries to match all of the Localities in the state with the search text anywhere in their names. So if you enter “Port” in as a place in Oregon, you’ll be asked to choose among Newport, Port Orford, Portland, Reedsport, Waldport, or Westport.
The search box tries to match all of the Localities in the state with the search text anywhere in their names. So if you enter “Port” in as a place in Oregon, you’ll be asked to choose among Newport, Port Orford, Portland, Reedsport, Waldport, or Westport.
![]() Leaving the box blank brings up all of the localities (of that type) of in the state.
Leaving the box blank brings up all of the localities (of that type) of in the state.
![]() When a single locality is found, it gets added to the notebook. When the search turns up multiple localities, you’ll be asked to choose among them.
When a single locality is found, it gets added to the notebook. When the search turns up multiple localities, you’ll be asked to choose among them.
Multiple Localities vs. Multiple Notebooks: What are the differences? discusses the pros and cons of notebook management, including using multiple localities in a single notebook.
See Notebook Settings for more on how you can control the way data is presented.
That’s it! Click " Activate Notebook " to start looking at data! The first page you’ll see is the Overview page for your active notebook.